The Great Bagel Adventure!

I love this recipe because if you do everything right you can bite into a nice fluffy, big, round, and chewy bagel!
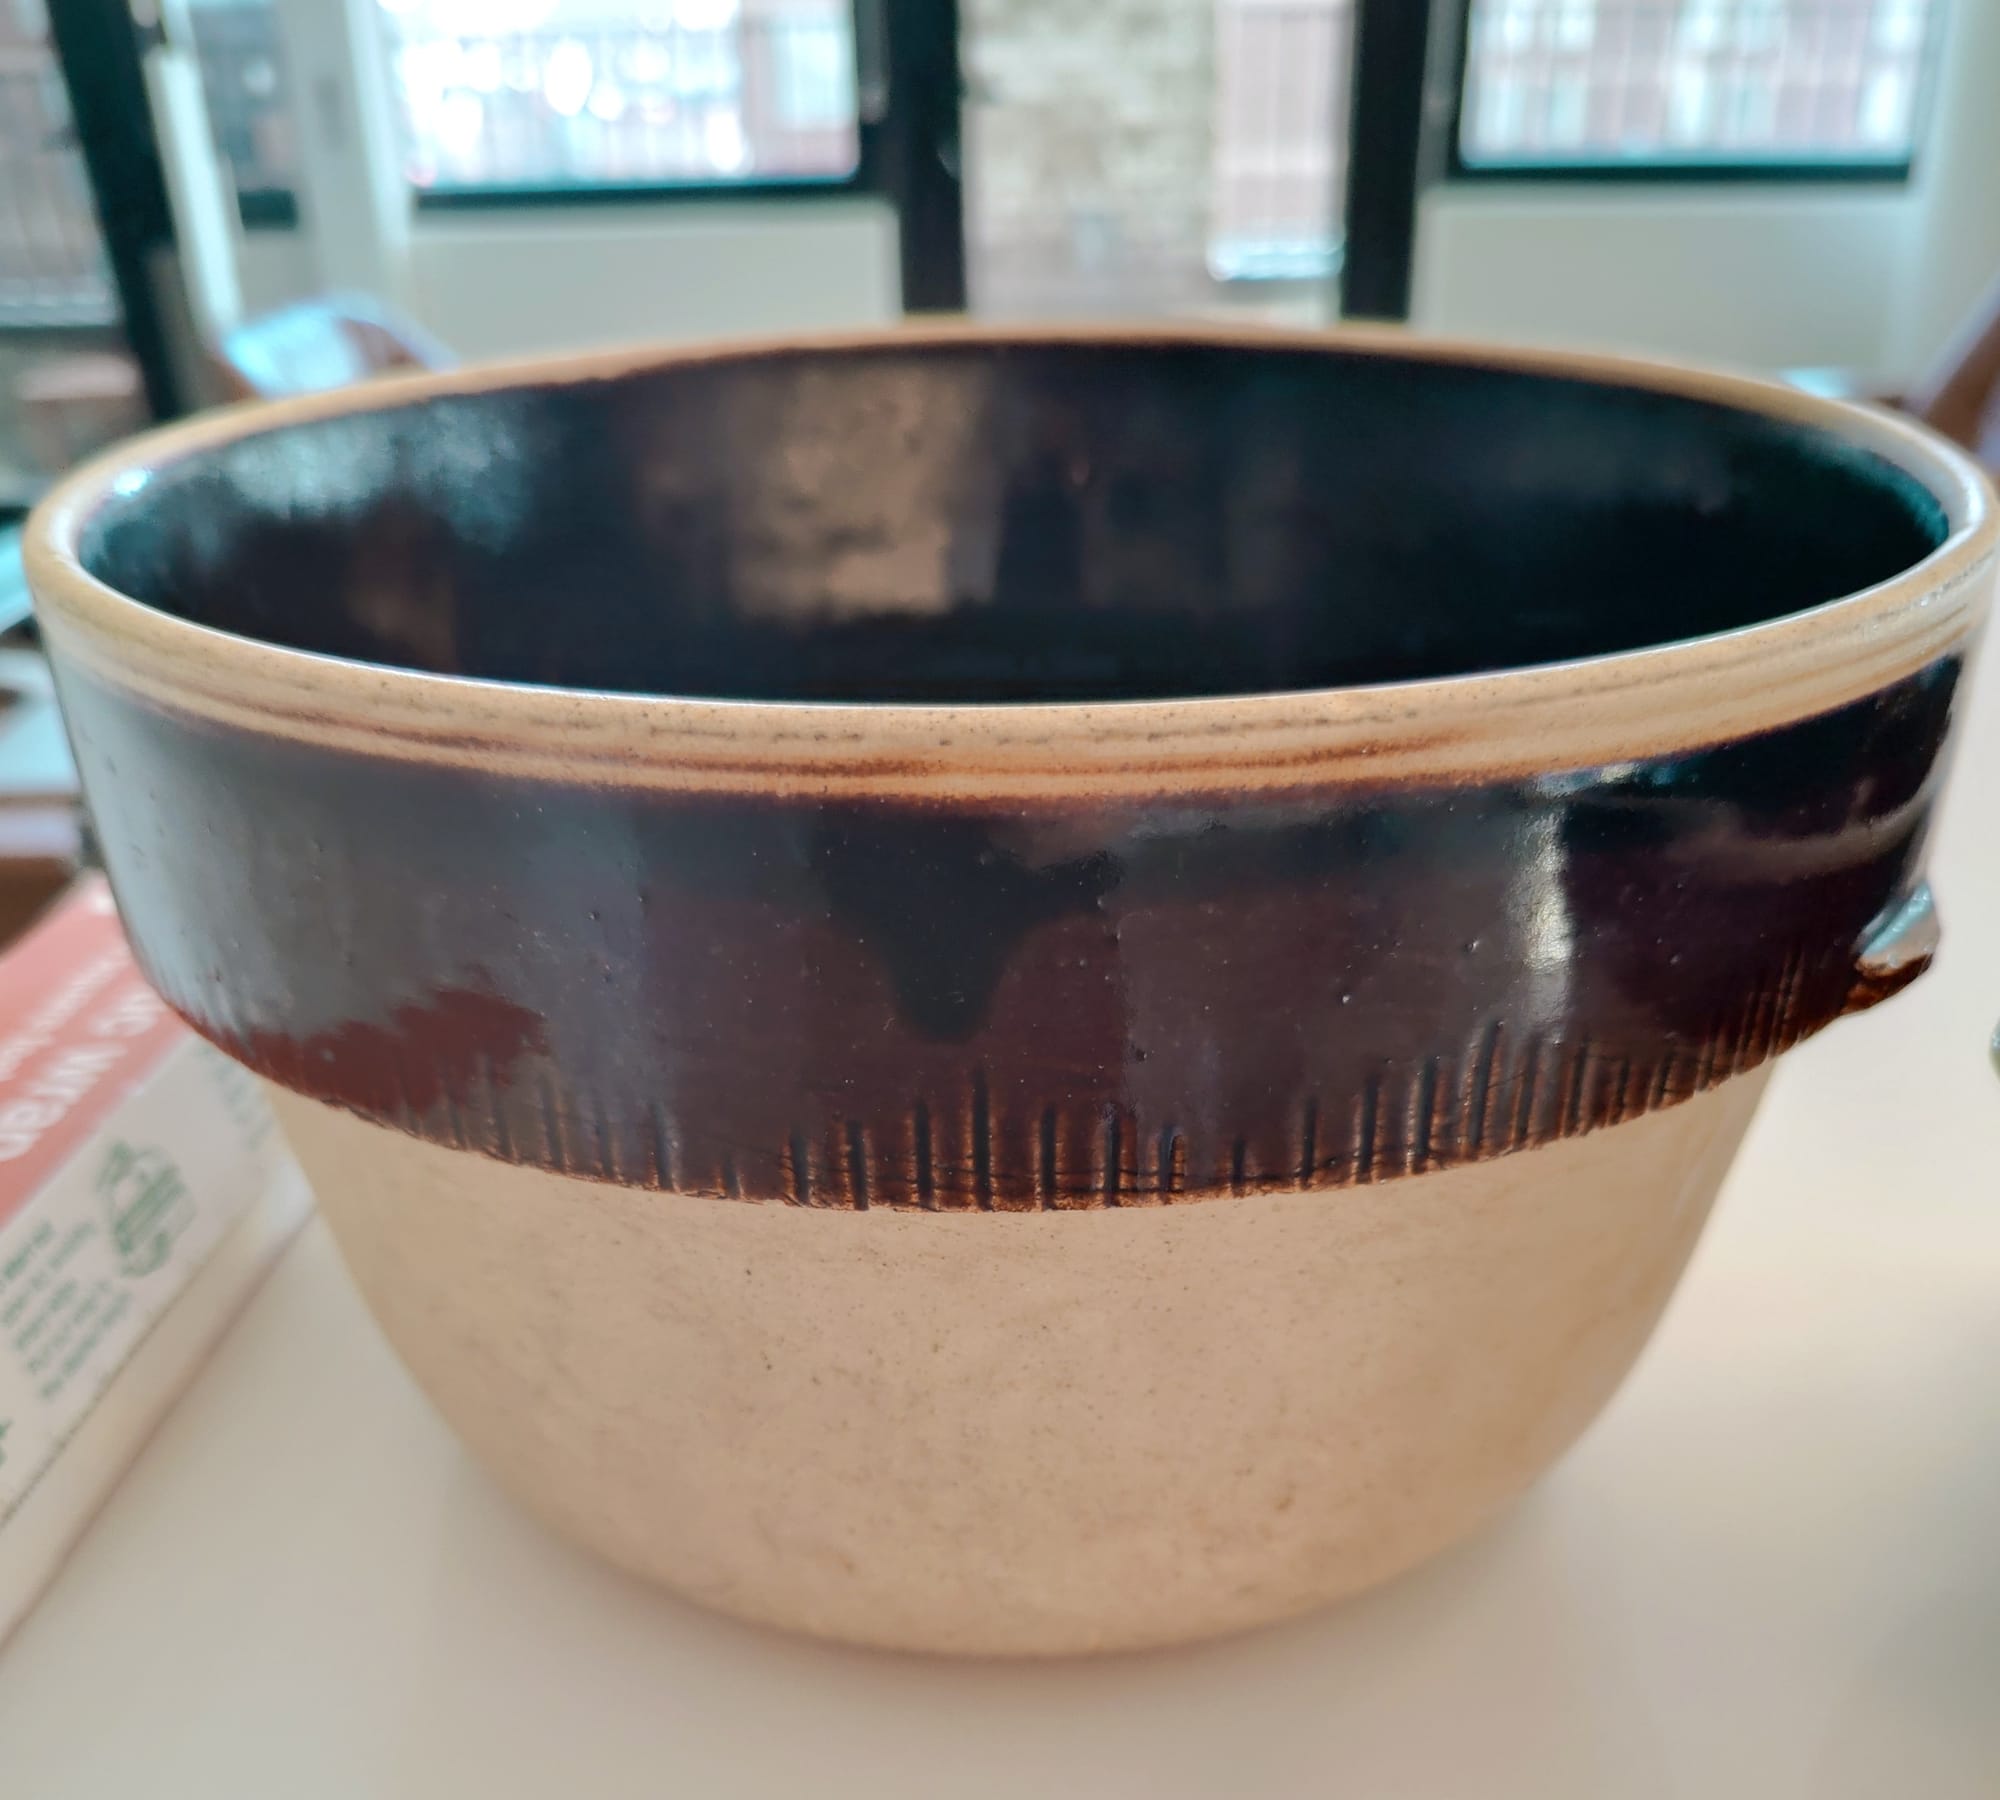
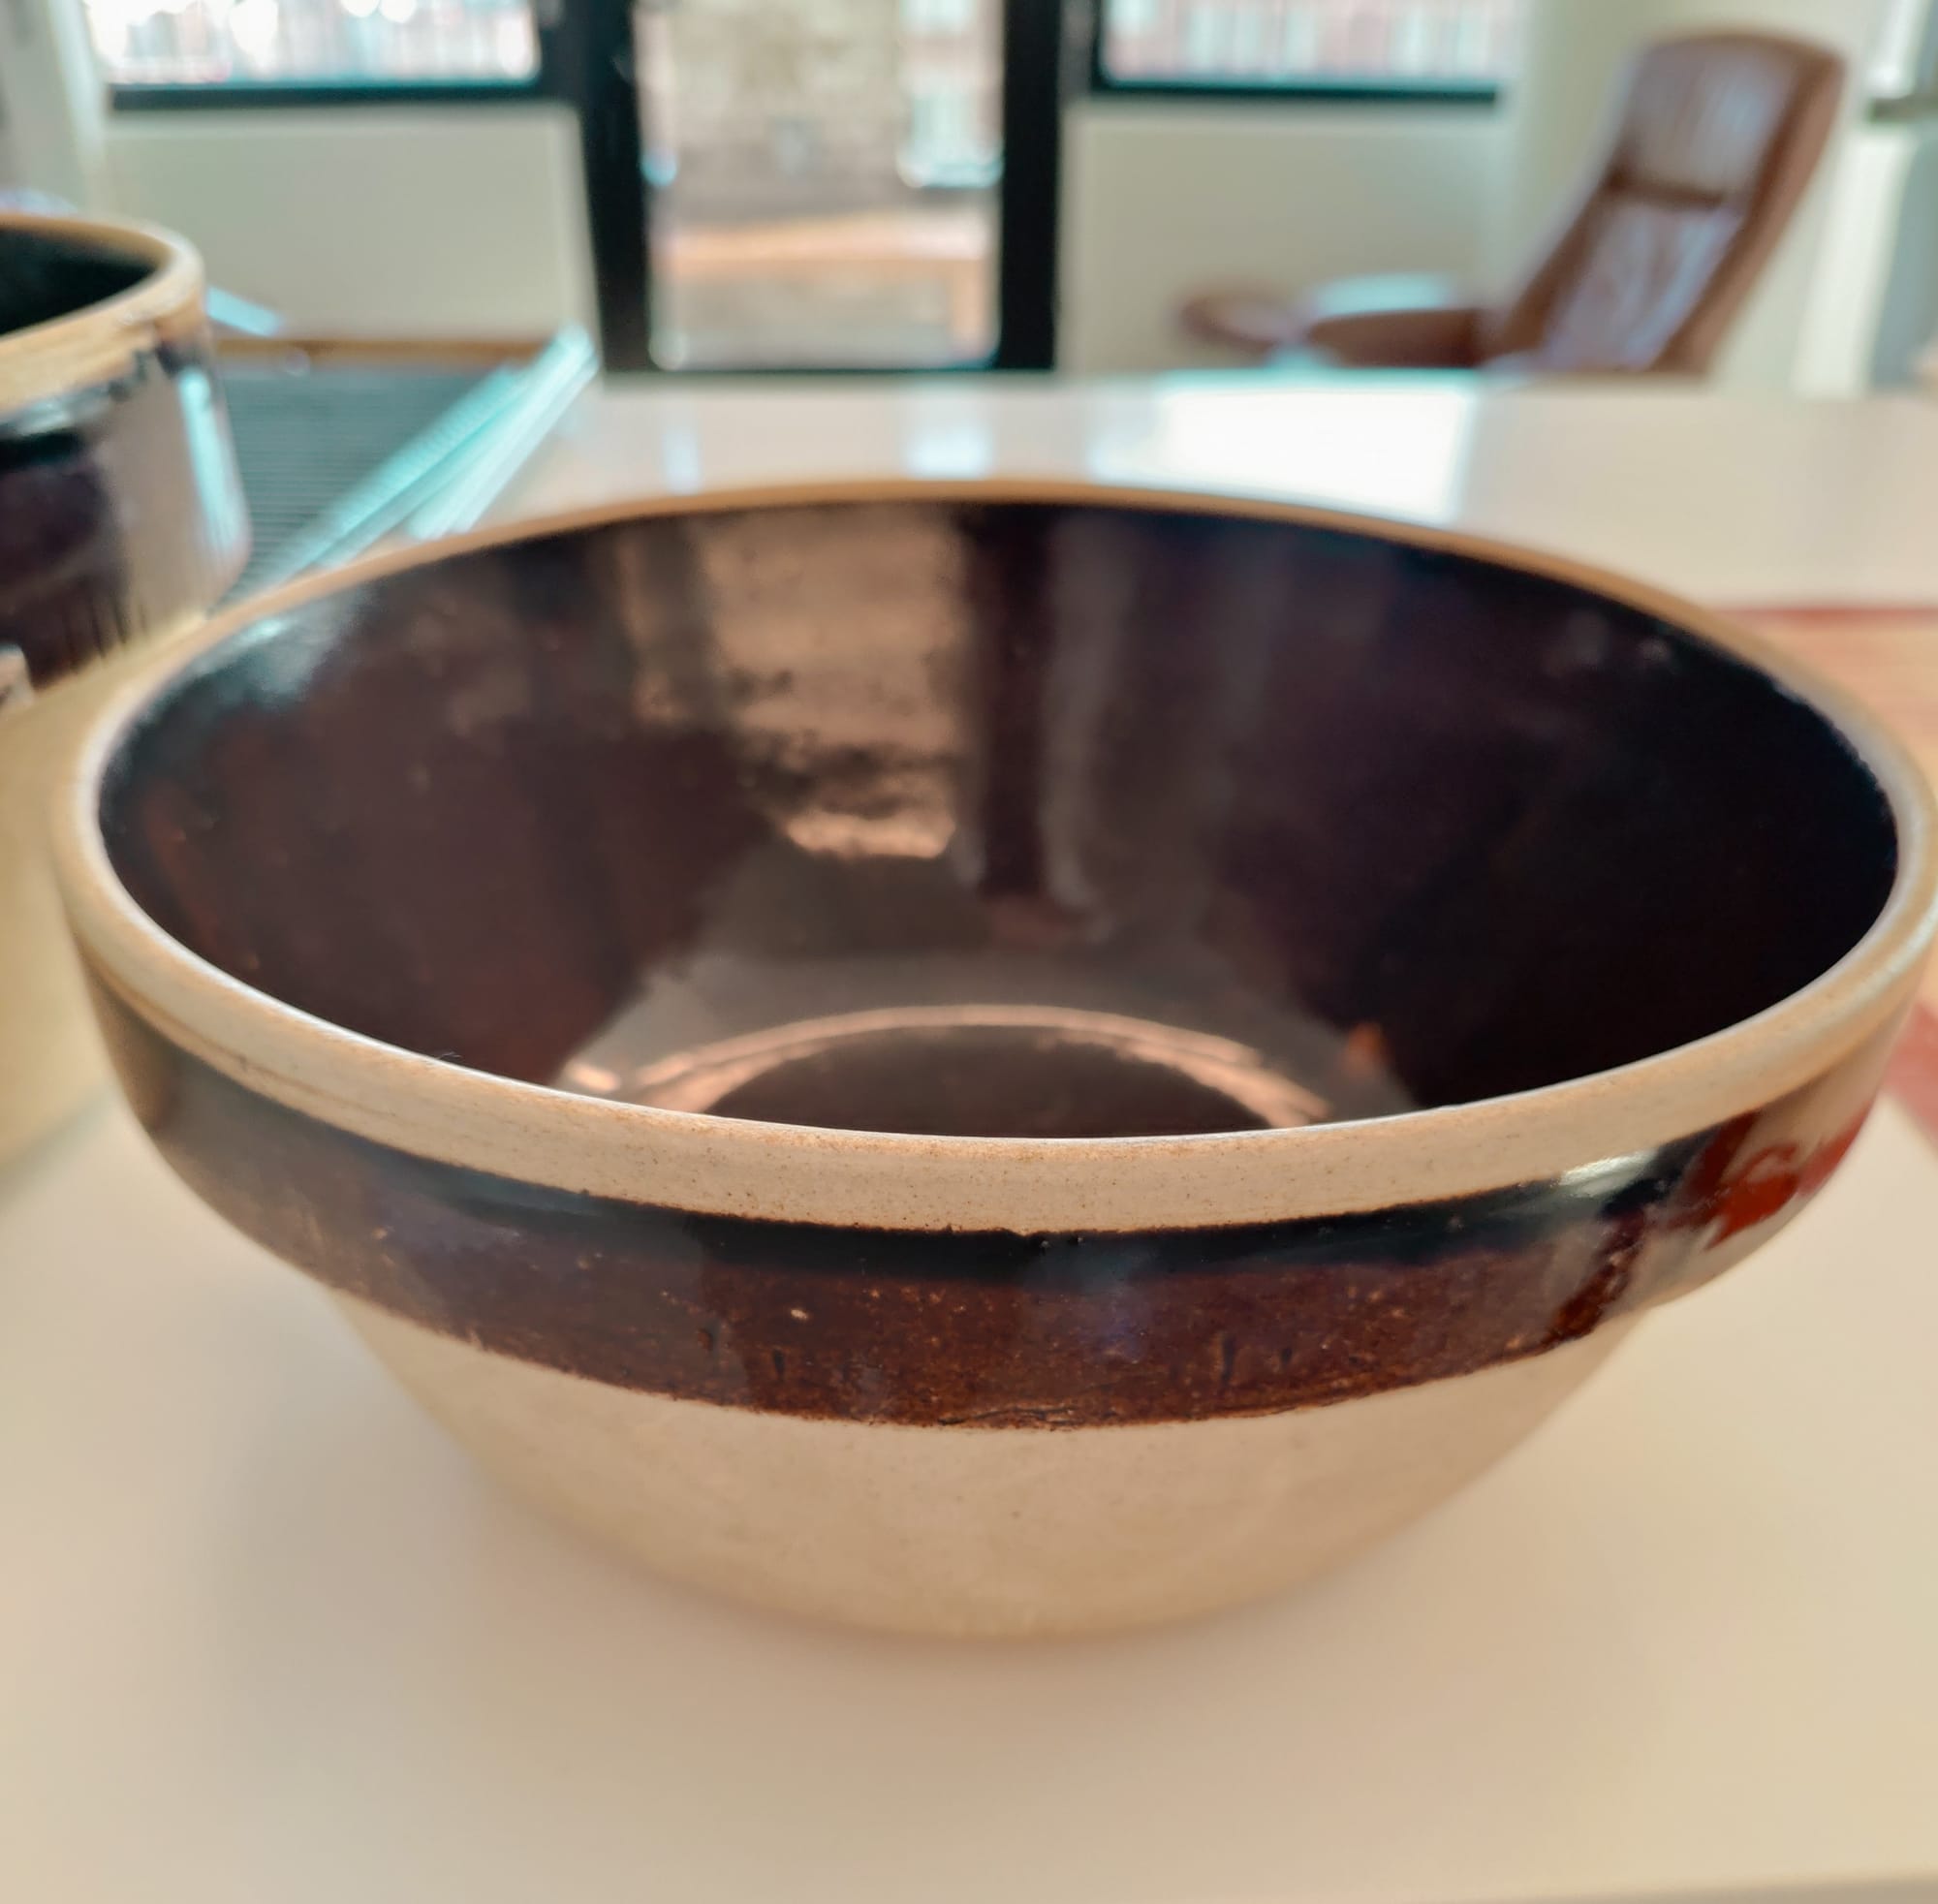
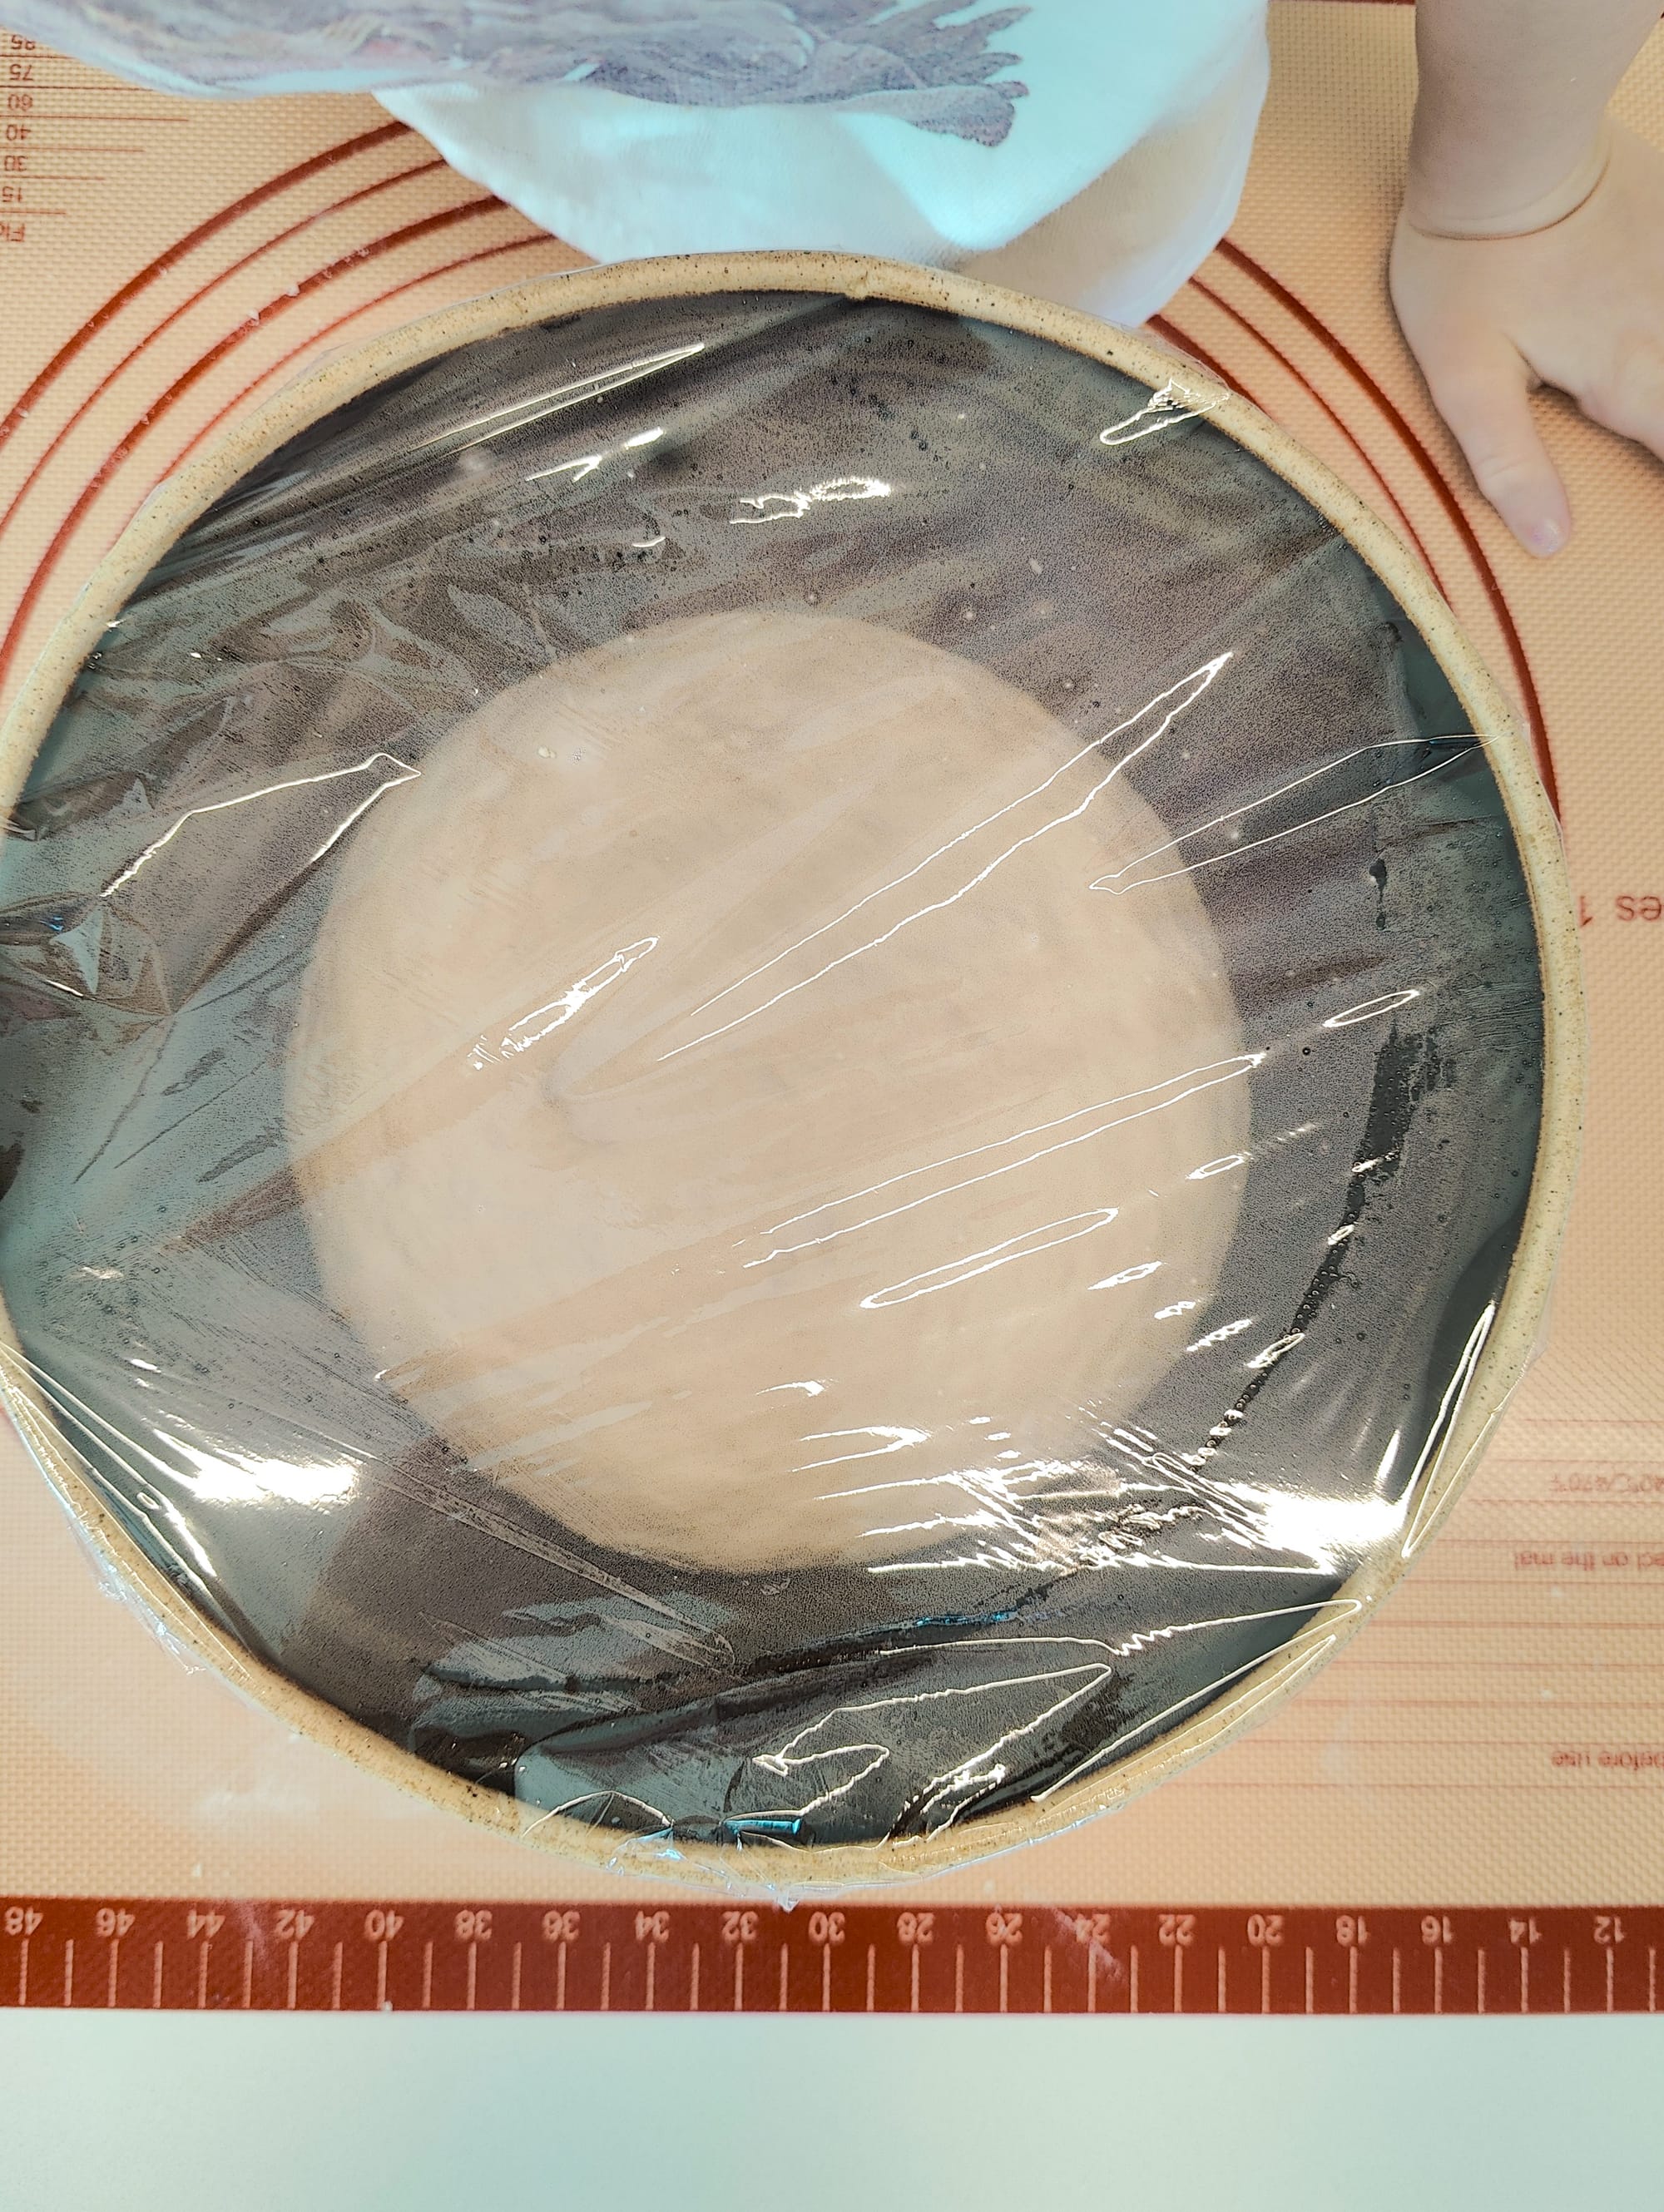
A special note: While making this video, Vesper got to be the fifth generation in Grandma's family to use a set of bowls that belonged to Vesper's great-great-grandmother. They're stoneware that's been glazed inside and are perfect for making bread. Can you believe this bowl is more than 100 years old??
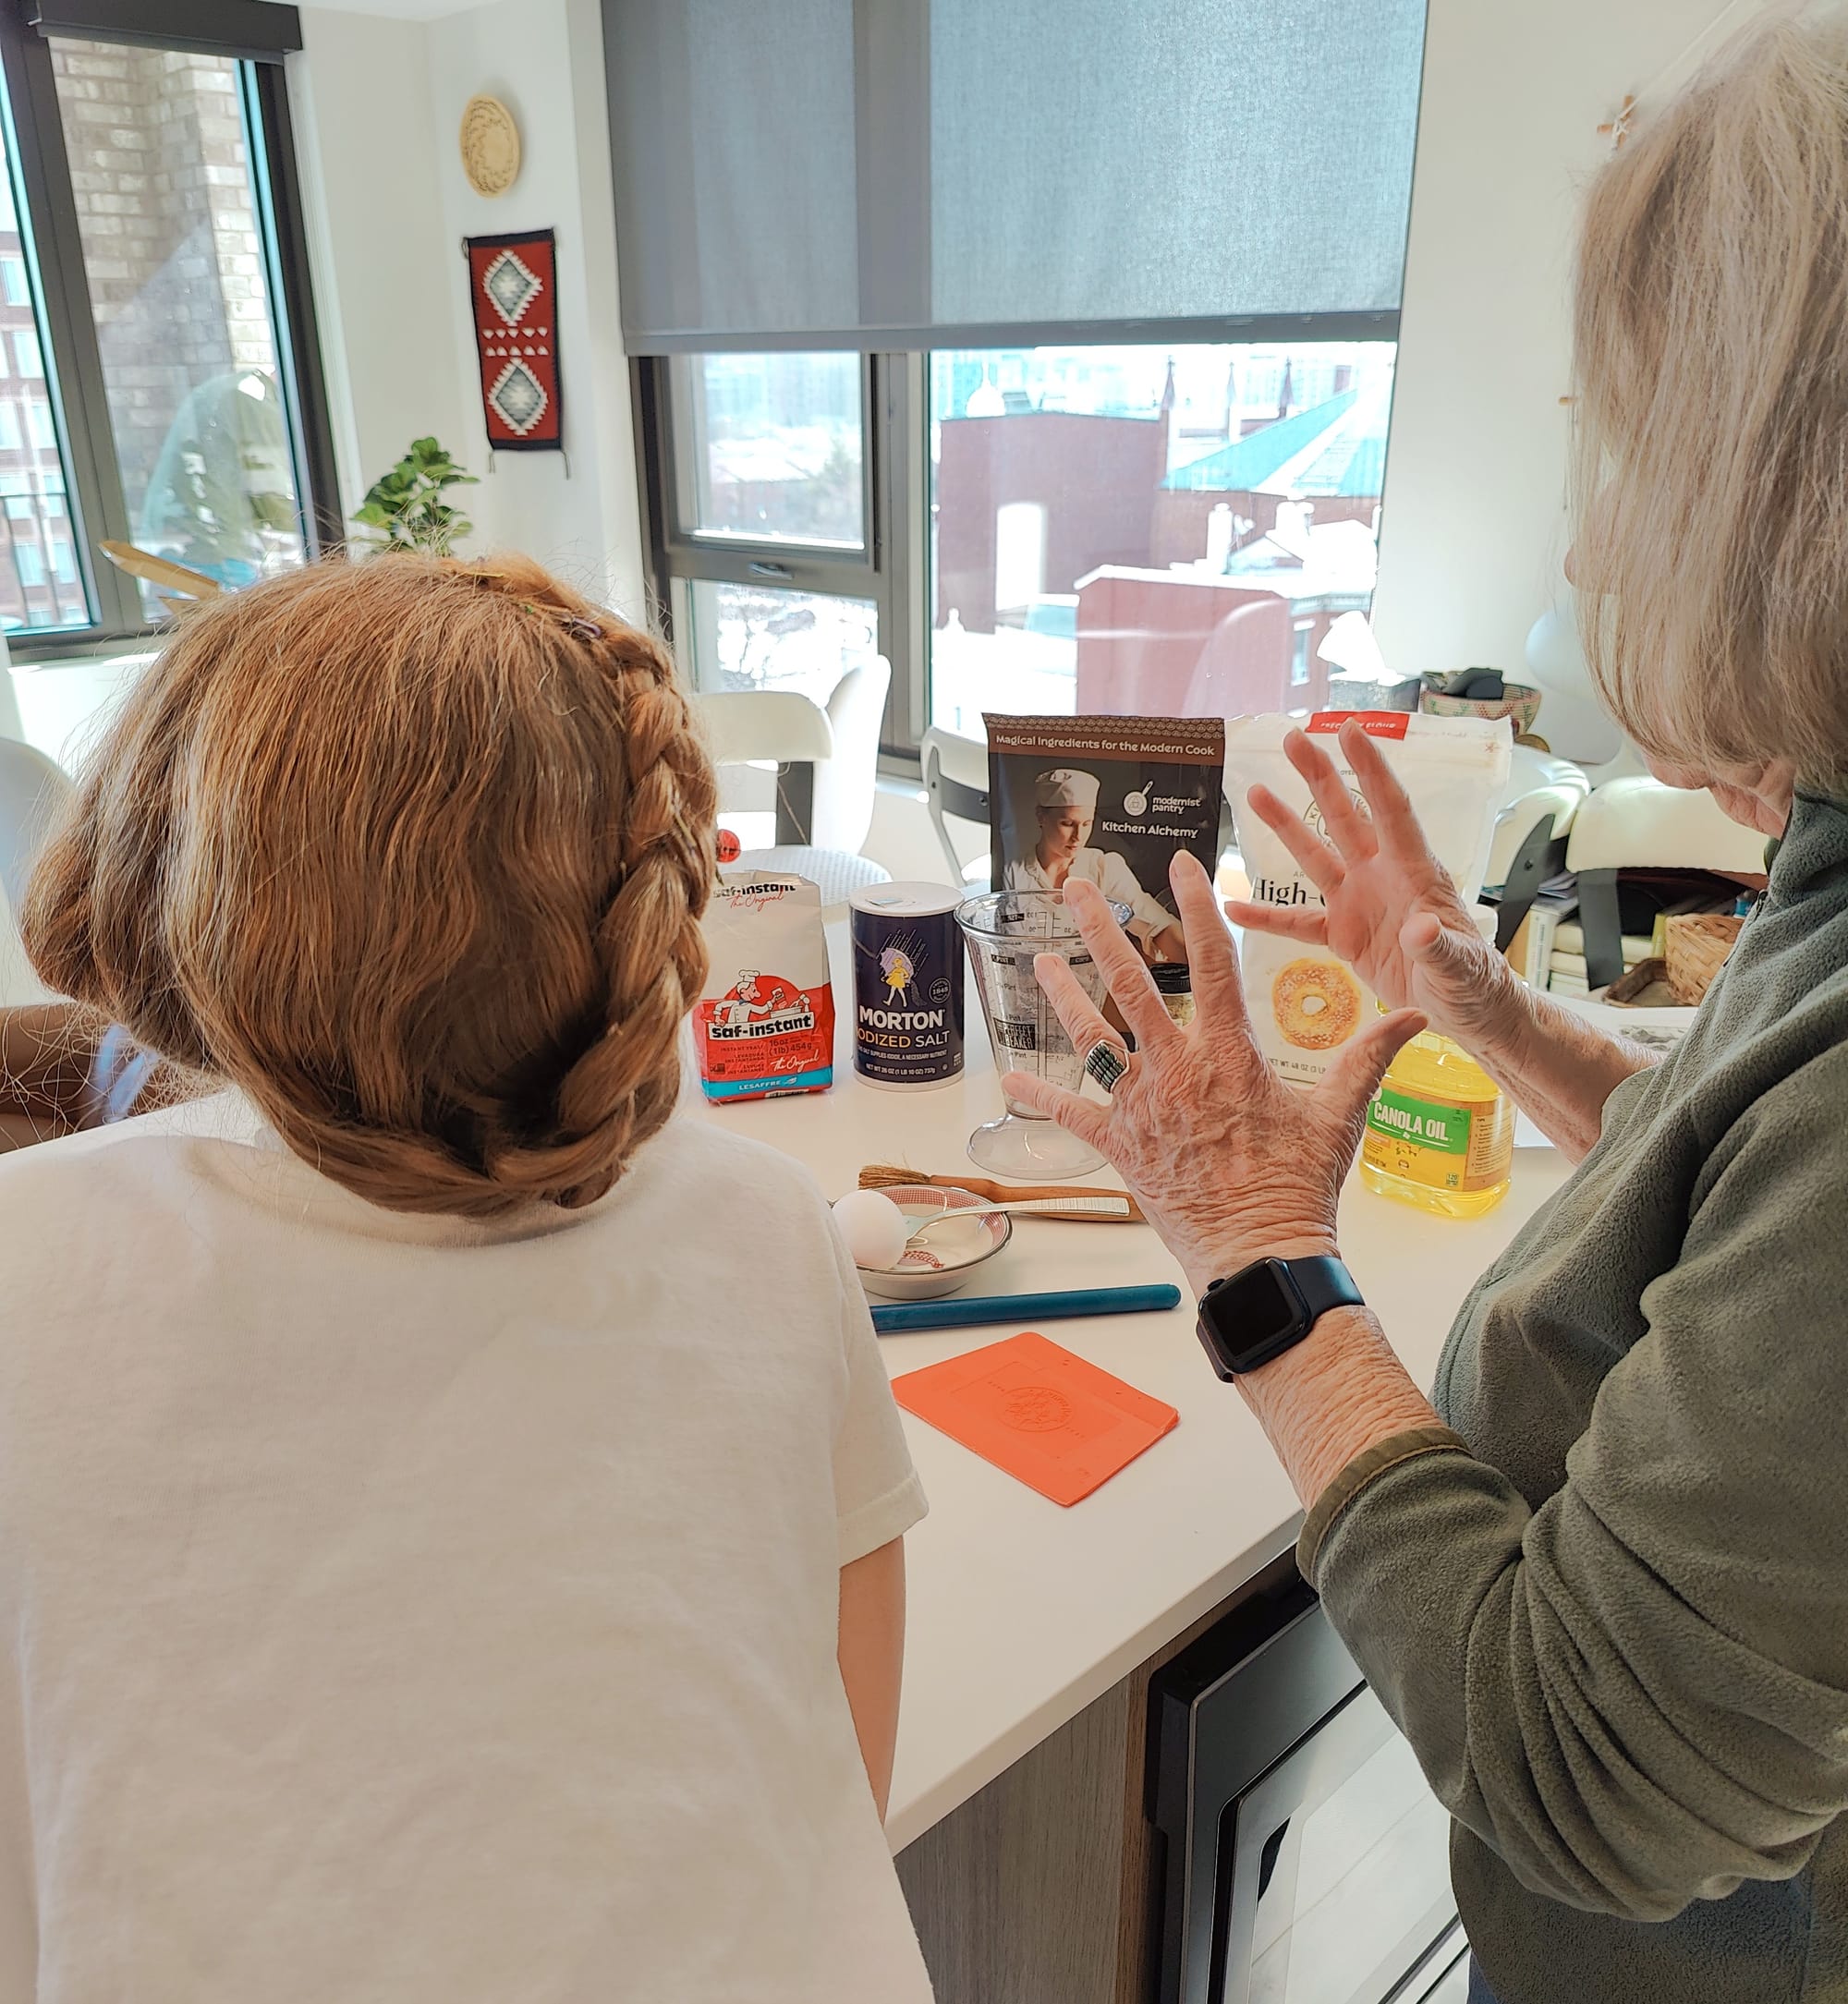
Watch Vesper and her sous-chef (Grandma) make bagels!
Don't forget to wait for the blooper reel at the end... and we also included a cooking math section at the VERY end (starting after bloopers)
Recipe
Grandma adapted this recipe from one on the King Arthur website.
Makes 12 (one dozen) bagels
Ingredients
Dough
- 1 T. (9 g) of instant yeast
- 4 c. (480 g) high-gluten flour (you can find this on the King Arthur website)
- 2 t. (12 g) table salt
- 1 T. (9 g) non-diastatic malt powder (King Arthur is a great place to get this)
- 1 1/3 c. (303 g) lukewarm water
Water Bath
- 2 quarts (1814 g) water (there are 4 cups per quart, so this is the same thing as 8 cups)
- 2 T. (18 g) non-diastatic malt powder
- 1 T. (14 g) granulated sugar
Toppings (optional)
- 1 egg white (for toppings)
- 1 T water
- Bagel toppings (e.g., sesame seeds, poppy seeds, salt, everything spice, za'atar)
Other
- Neutral oil (e.g., canola) to grease mixing bowl and baking sheet/parchment
Equipment
- Measuring spoons
- Measuring cups for liquids
- Measuring cups for dry ingredients
- Kitchen scale (optional - for precisely measuring ingredients)
- Large mixing spoon (optional)
- Large silicone mat (optional)
- Large mixing bowl (for mixing the dough and for the dough to rise in)
- Plastic wrap
- Dough knife (or sharp knife)
- Large pot (for boiling the bagels)
- Spider or slotted spoon (for boiling the bagels)
- Sheet pan(s)
- Parchment paper (optional)
- Pastry brush (if adding toppings)
- Oven mitts
- Spatula
- Wire cooling rack
Directions
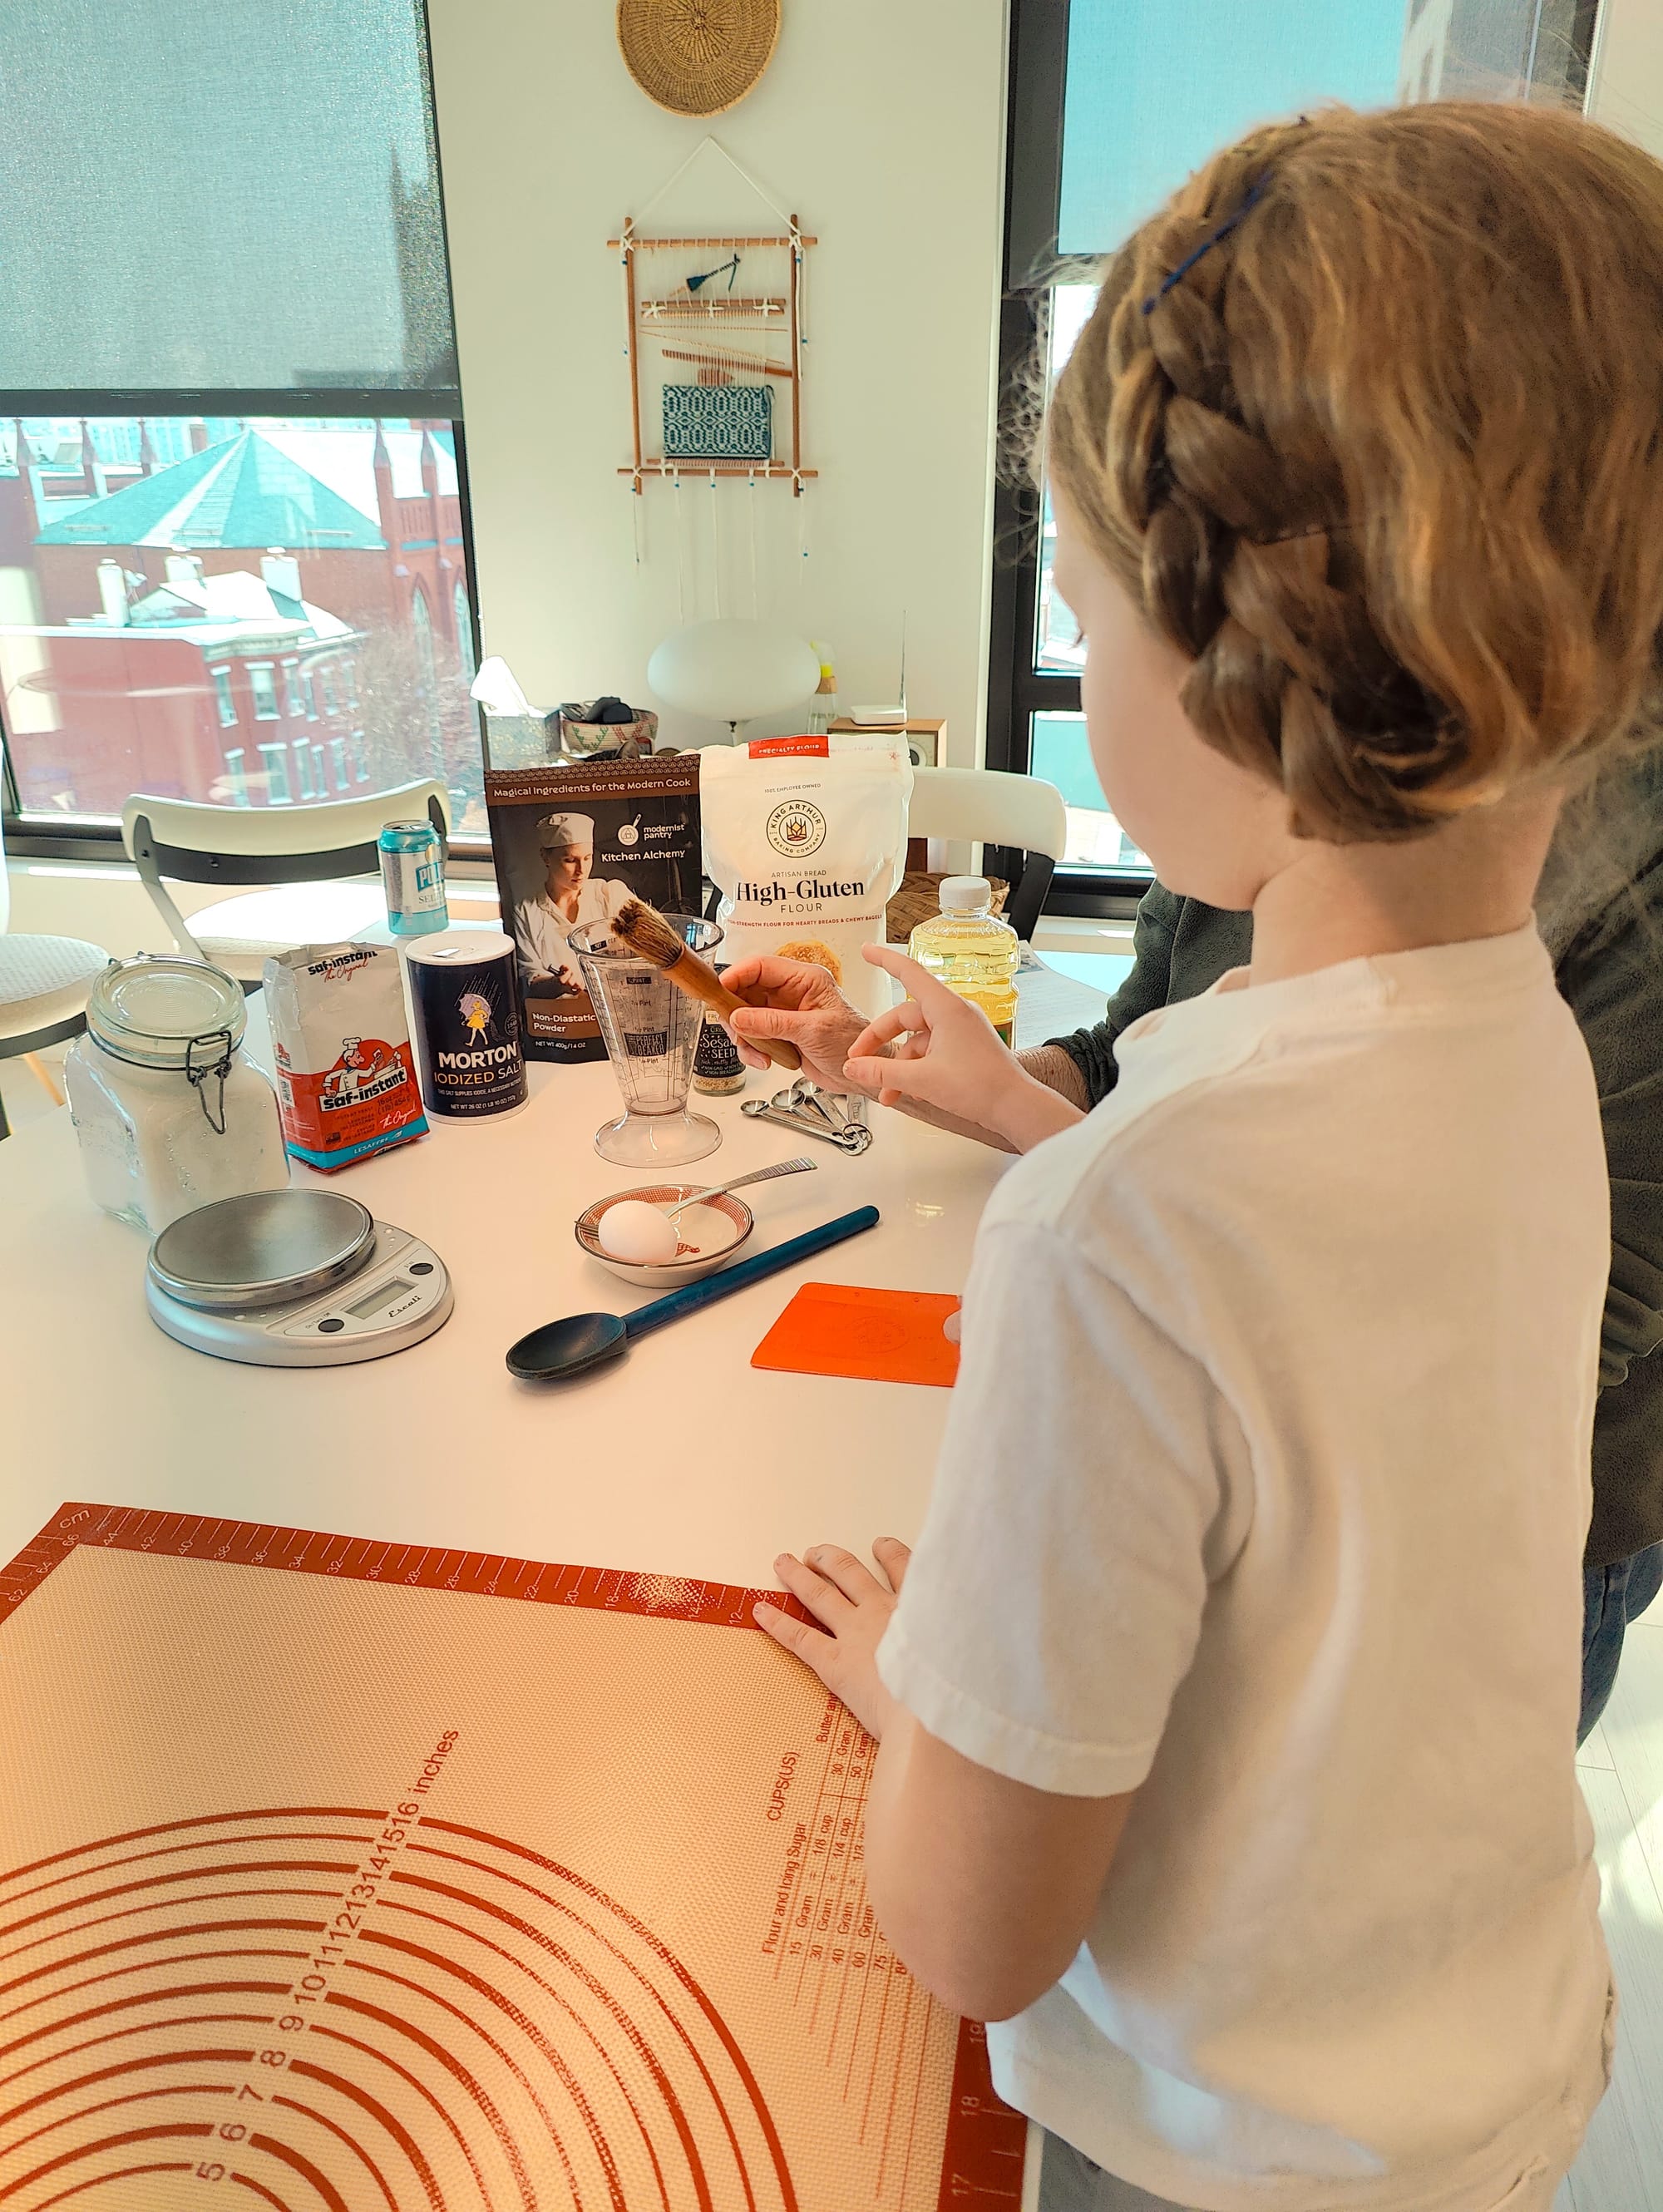
Step 1: Make the dough (video times 3:36-7:41)
- Measure out and mix together all of the dough ingredients in a large mixing bowl. Stir or mix by hand to combine.
- Lightly flour a silicone mat or clean countertop.
- Place the dough ball onto the mat or countertop and knead it by hand for up to 10-15 minutes. The dough will be very stiff and shaggy, so it will take some time for it to come together and be smooth.

Step 2: Let the dough rise and prepare your baking sheets (video times 7:41-9:08)
- Lightly grease a large bowl with a neutral oil.
- Place the dough ball in the bowl and cover the top with plastic wrap so no air can get in.
- Set it aside to rise for about 1-1.5 hours (until almost doubled in size).
- While the dough is rising, line two baking sheets with parchment and lightly grease the parchment with neutral oil. If you don't have parchment, you can grease the pans themselves (you just may have more clean-up to do at the end).
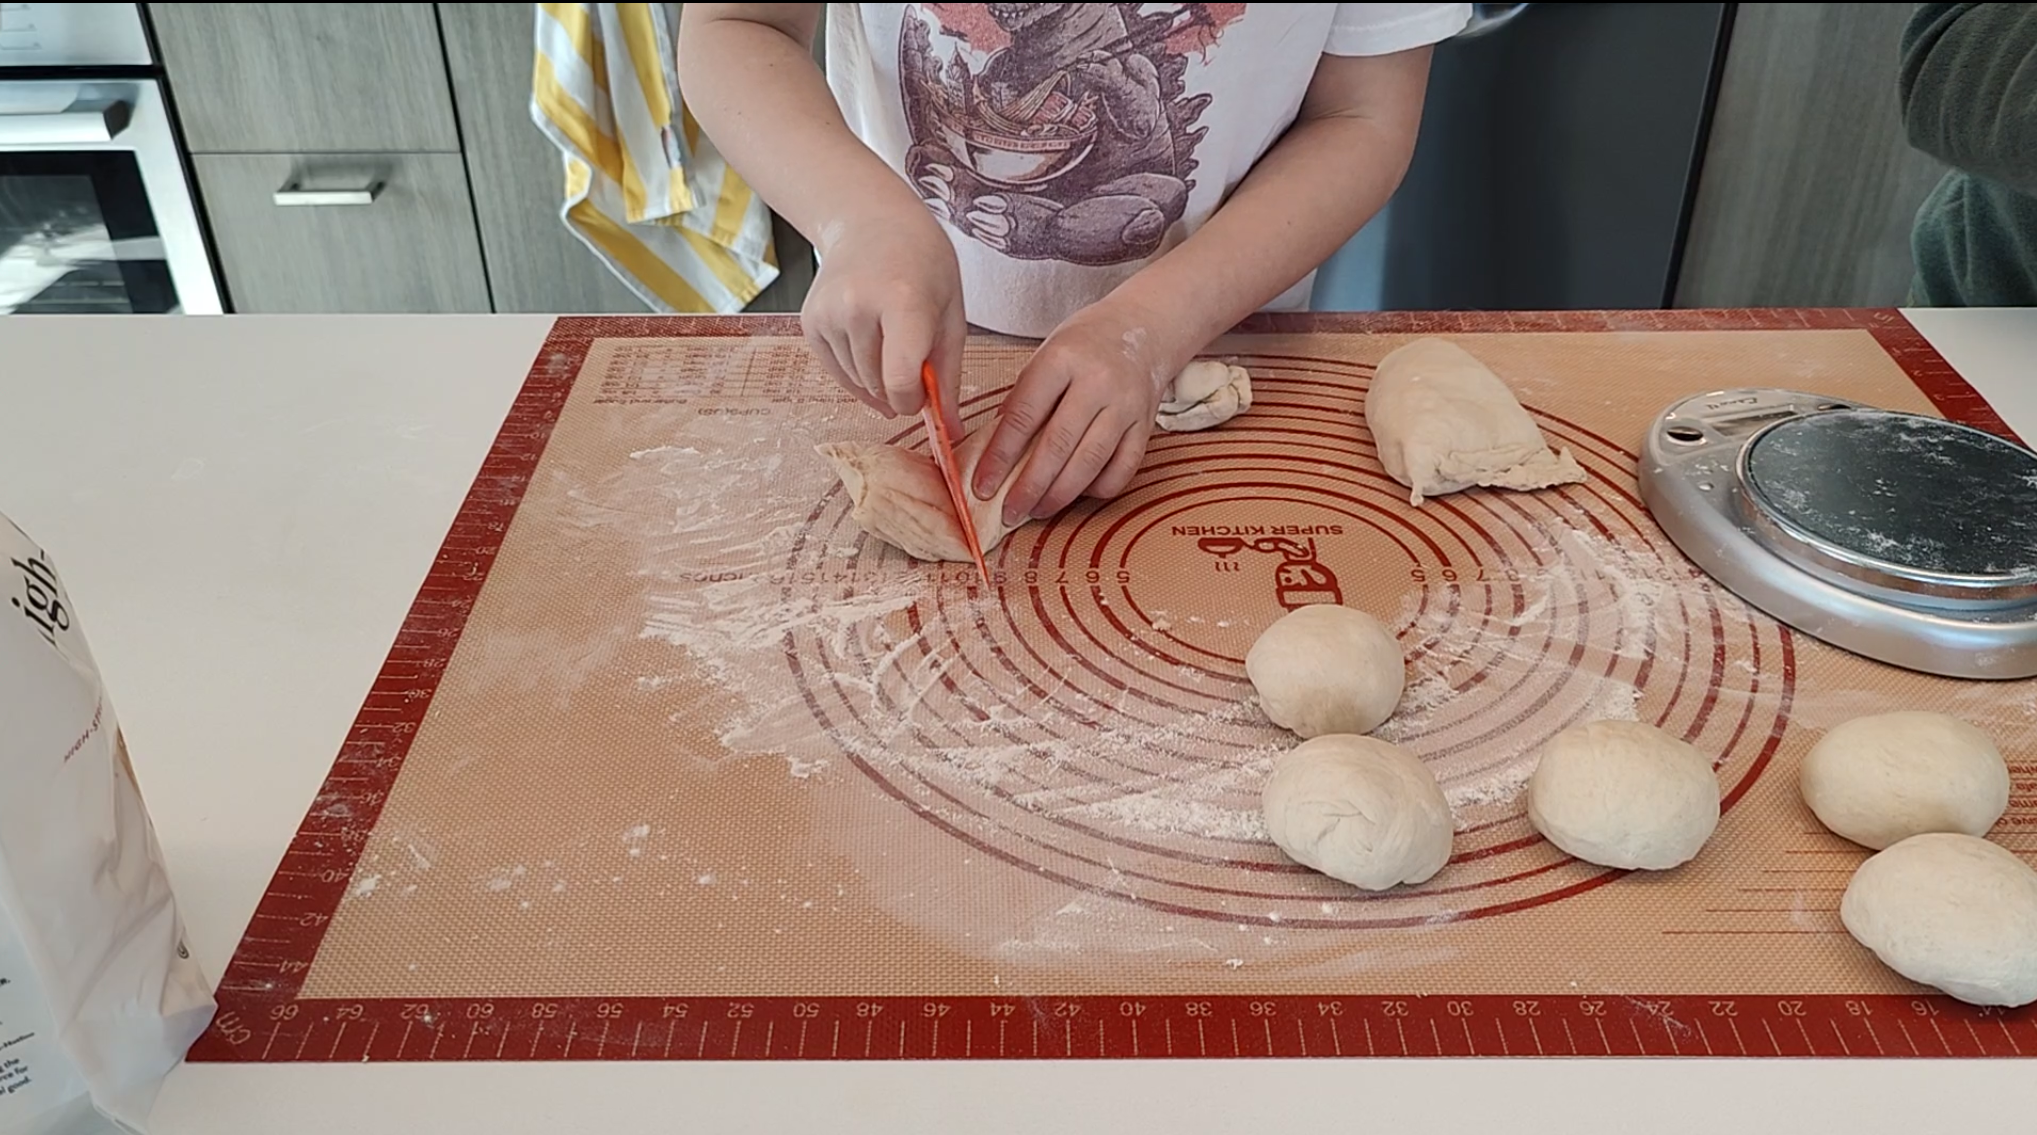
Step 3: Divide the dough (video times 9:08-11:32)
- Transfer the dough back to your work surface (silicone mat or countertop).
- If you'd like to be REALLY exact about having each bagel be the same size, weigh the dough ball. If you plan to make 12 bagels, divide the total weight by 12 to see how much each piece should weigh.
- Using a dough knife (or sharp knife), divide the dough into 12 pieces (for standard-sized bagels). Note that these bagels will be smaller than what you might see in the supermarket or at bagel shops. Feel free to divide the dough into fewer pieces (e.g., 8) if you'd like each bagel to be larger).
- You can use your kitchen scale to weigh each piece to make sure each bagel will be about the same size. If you're making 12 bagels, then each piece should be 1/12 of the total weight of the dough.
- Working with one piece at a time, roll it into a smooth, round ball. Cover completely with plastic wrap so air can't get in. Let them rest for 30 minutes.
Step 4: Prepare the water bath and preheat the oven (video times 11:32-12:15)
- While the dough balls are resting, make the water bath by putting the water, non-diastatic malt powder, and sugar in a large pot on the stove.
- Heat the pot to a very gentle boil (with the help of an adult if you're little like Vesper)
- Preheat your oven to 425 degrees F.
Step 5: Shape the bagels (video times 12:15-13:36)
- Working on your silicone mat or countertop, use your index finger to poke a hole through the center of each dough ball.
- Twirl the dough on your finger to stretch the hole until it's about 1.5-2 inches in diameter.
- Put six bagels on each baking sheet.
IMPORTANT: if you're a kid, get an adult's help with the rest of the steps
Step 6: Boil the bagels (video times 13:36-14:58)
- Drop the bagels gently (three or four at a time if you can) into the simmering water. If needed, increase the heat to bring the water back to a gentle boil.
- Cook the bagels for 2 minutes. Flip them over with a spider or slotted spoon and cook for 1 more minute.
- Using a spider or slotted spoon, remove the bagels from the water and place them back on the baking sheets (with 6 to a sheet).
- Repeat with the remaining bagels.
Optional Step 7: Adding toppings (14:58-15:46)
- Separate 1 egg, keeping the white. Beat the egg white with 1 T. of water.
- Just before baking, use a pastry brush to glaze the tops of the bagels with the egg white mixture.
- Sprinkle each bagel heavily with toppings.
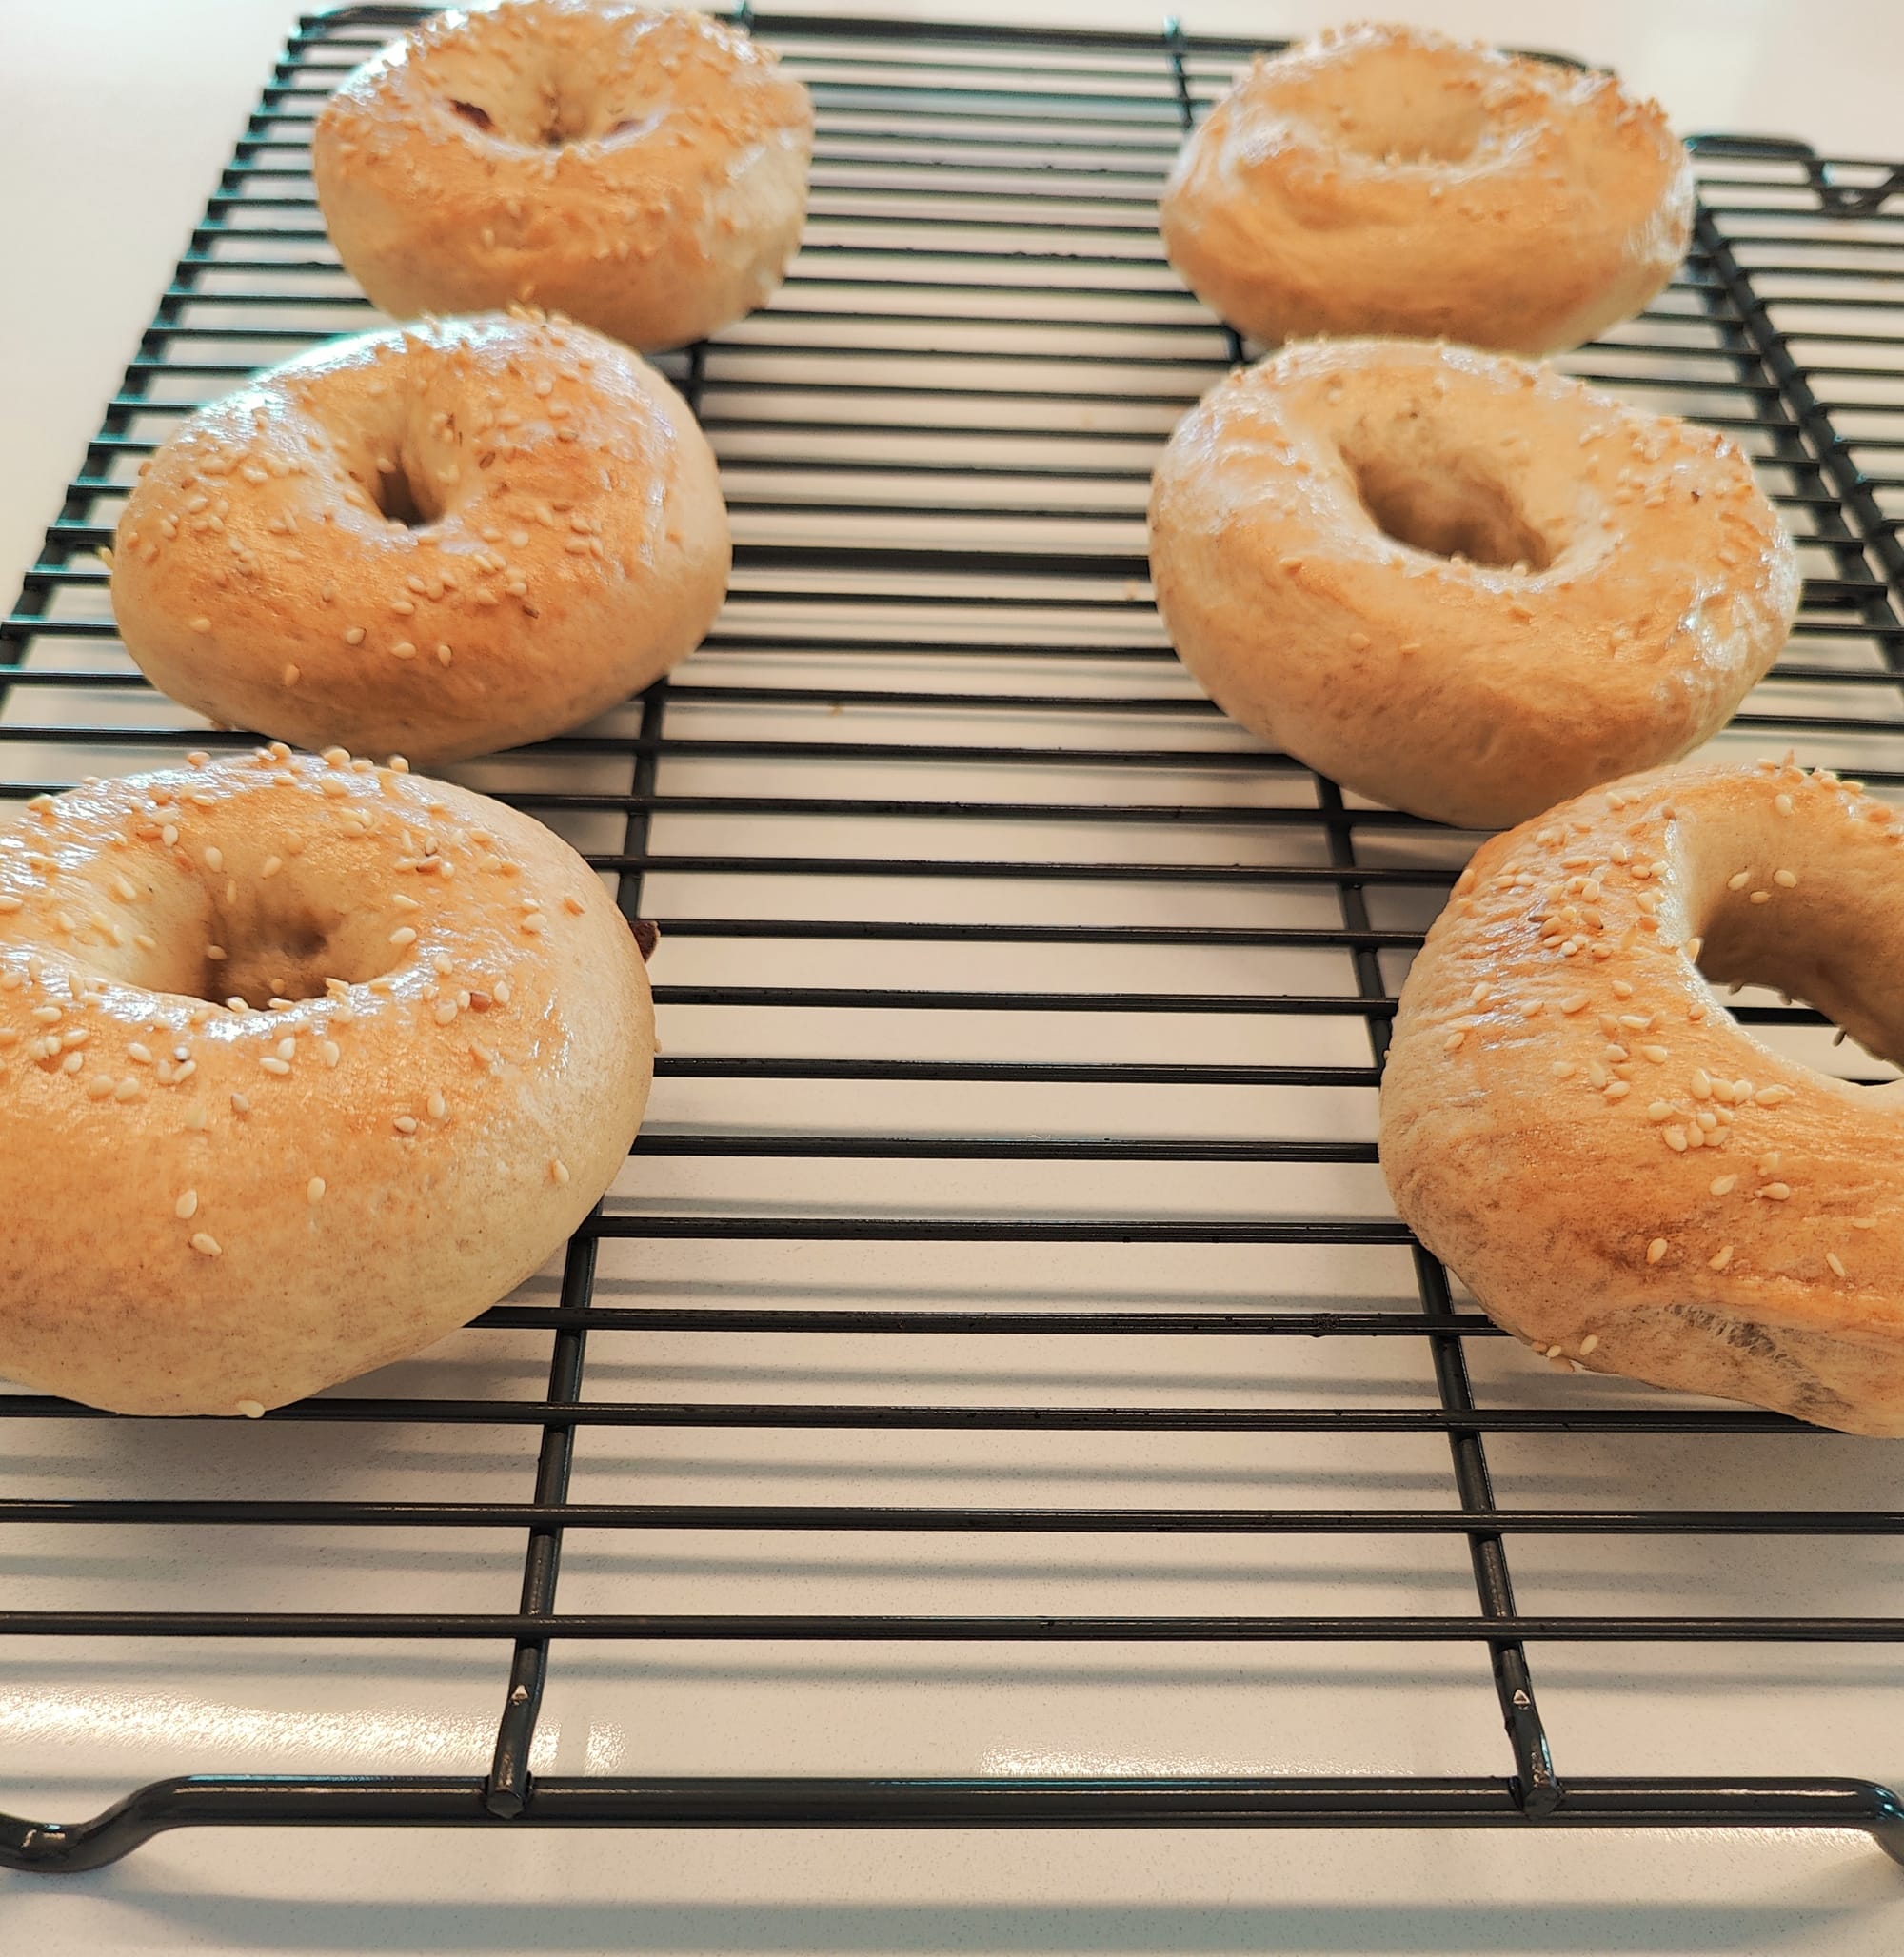
Step 8: Bake the bagels (15:46-17:20)
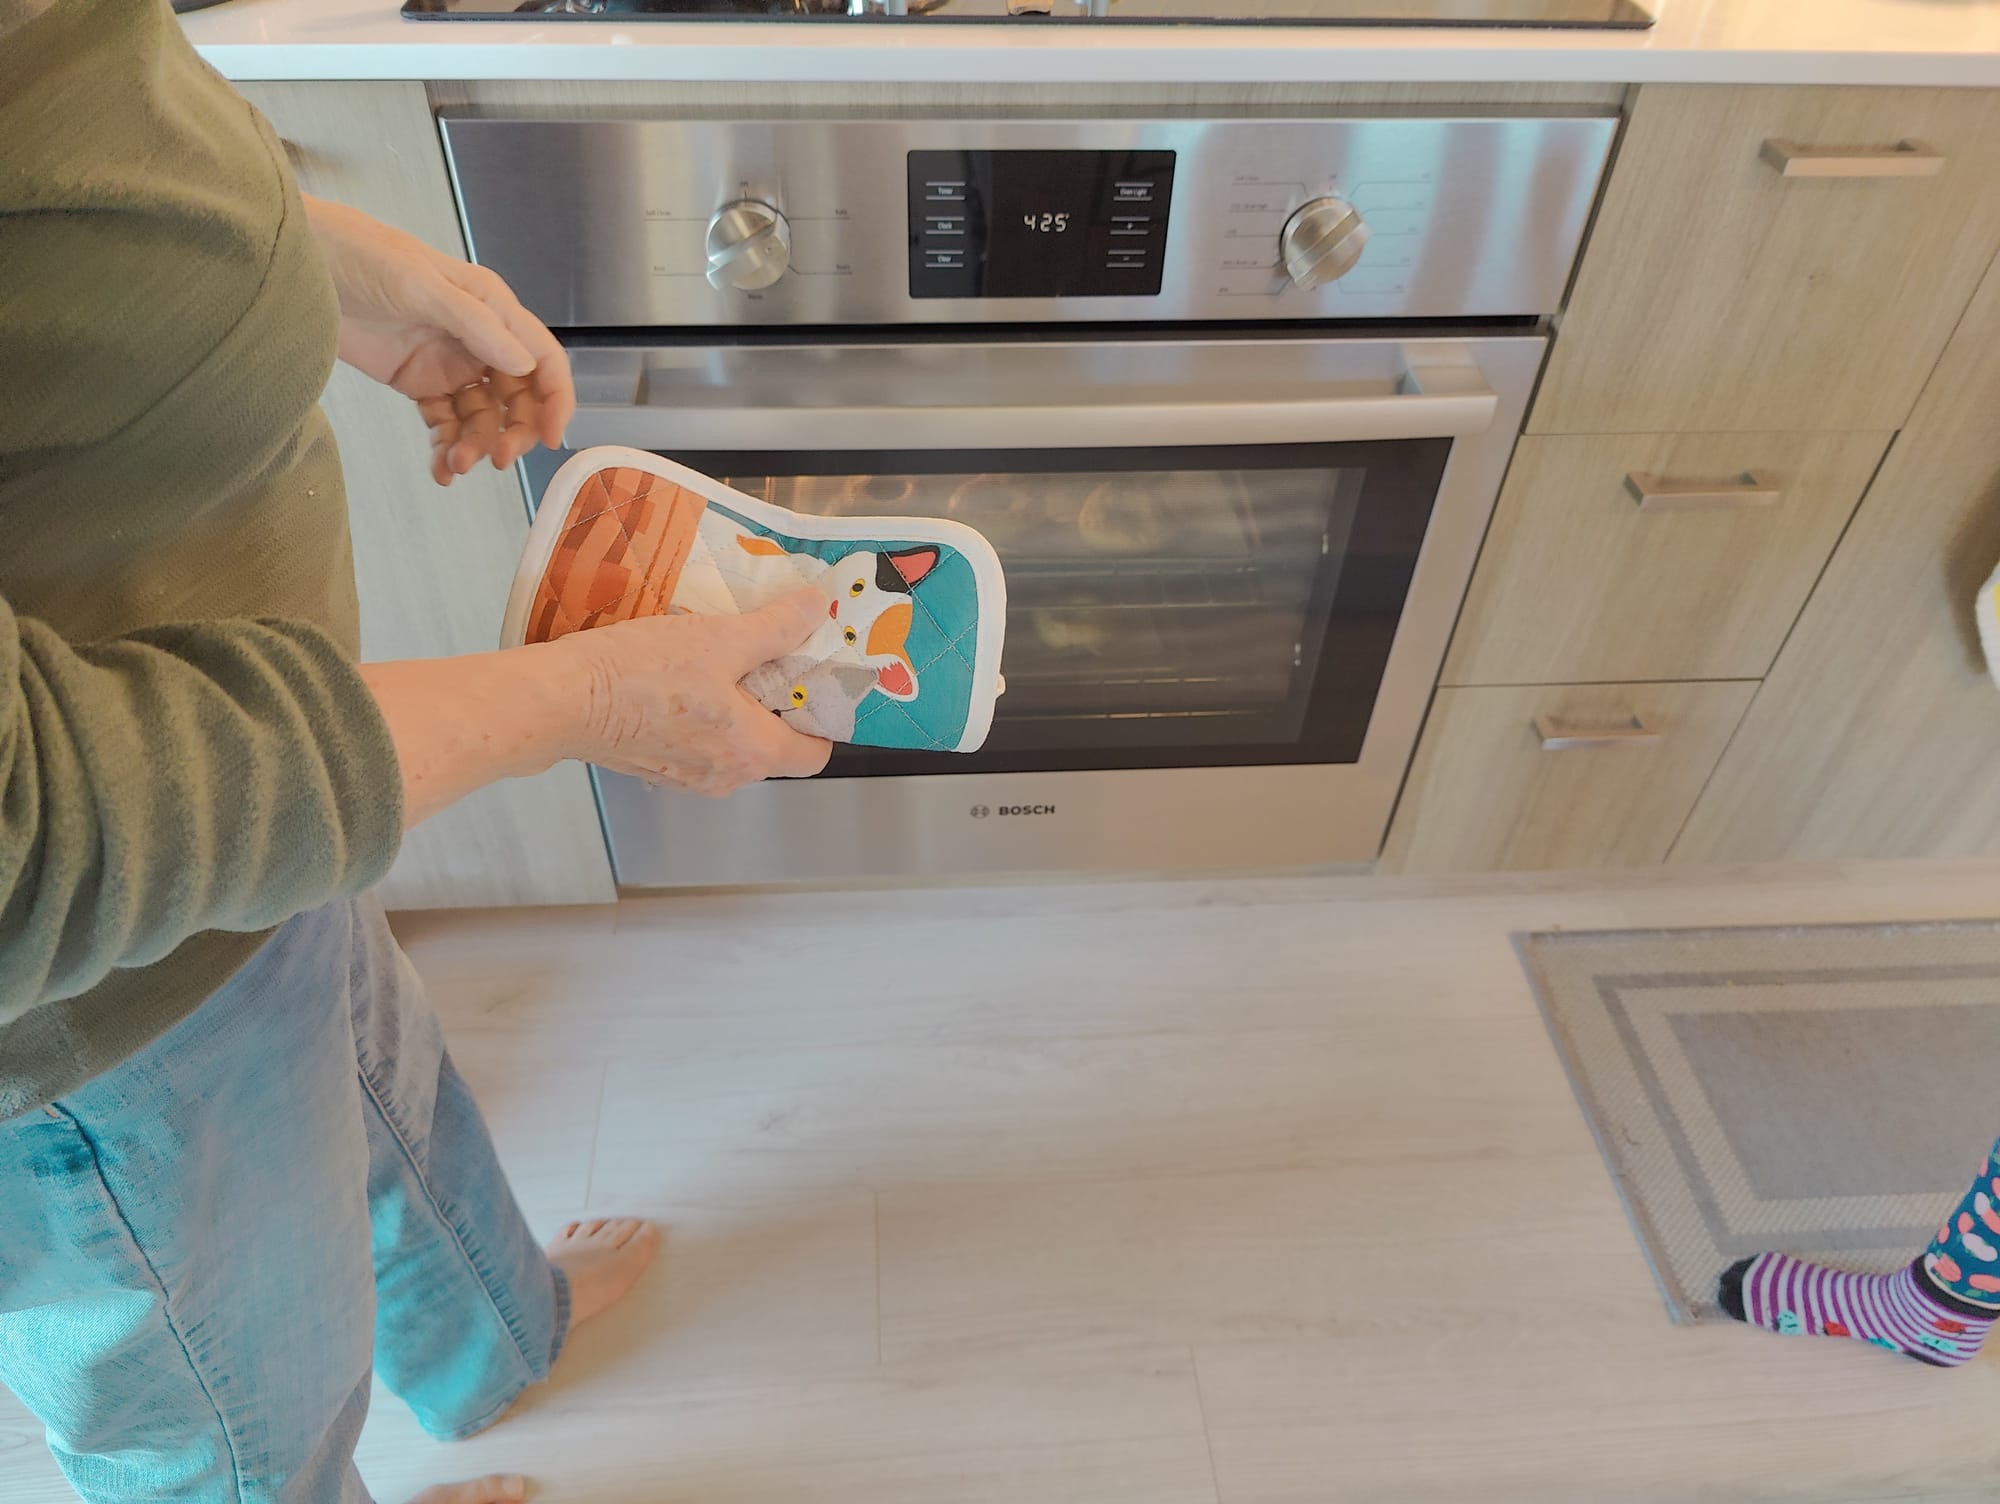
- Bake the bagels for 20-25 minutes, turning them over after 15 minutes.
- Remove the pan from the oven when until they're as browned as you like them.
- Move bagels to a wire rack to cool for about 10 minutes.
- Get an adult's help and be EXTRA careful cutting the bagels - it's very easy to cut yourself.
- EAT!
Vesper's Tiny Chef Tips
Tip 1: When you make the egg wash you always want to make sure to just add the egg whites not the egg yolk because if you do add some yolk you're going to end up with a nasty disgusting bagel and you don't want that.
Tip 2: Make sure that when you're making the bagels you add just the amount you need. But tell you what I have a little secret if you want to measure the flour right you should take a butter knife and take the side that you're not going to use to cut butter then scrape the extra flour off.
BUT FRIENDS LET'S REMEMBER THAT THE MOST IMPORTANT THING IS THAT YOU HAVE FUN AND ENJOY YOUR FOOD!

Visit and subscribe to Vesper's YouTube channel here: https://www.youtube.com/@vespercooks